Tomáš is a Bisq contributor, crypto enthusiast, libertarian, and voluntarist.
If you’d like to contribute a post, please reach out on Keybase or on our forum!
This blog post series will try to be practical using the “learning by doing” rule. Since Bisq uses Bitcoin as its blockchain of choice for the trade protocol and for the DAO itself, it is important that we understand the basics of Bitcoin first.
First, we will setup a regression test Bitcoin chain as a playground where we can observe how things work and how to interact with the blockchain. As this chain has no value and we can generate new blocks whenever we want, it is ideal for learning without actually risking losing real money. Later, I will show what a coinbase transaction looks like and what it is good for. At the end, we will create our very own transaction using the command line tool bitcoin-tx which is shipped with Bitcoin Core. Bitcoin Core is the reference implementation of the Bitcoin protocol. The graphical version is called bitcoin-qt and it ships with a command line tool that can create transactions called bitcoin-tx.
Prerequisite: bitcoin-qt (v0.17.1 or later)
Let’s dive in, shall we?
Mainnet, testnet, regtest—what’s in a name?
Bitcoin and most other cryptocurrencies have 3 modes of operation.
Mainnet is the network which is used as the official version, and it has value. All real transactions happen on this network, people get paid or pay using mainnet.
Testnet, a network which has almost the same rules (some opcodes are forbidden on mainnet, while this restriction is lifted on testnet) as mainnet. It has peer discovery, that is it can find peers on the testnet network, similar to mainnet, and a peer-to-peer (p2p) network is running it.
Regtest is a private blockchain which has the same rules and address format as testnet, but there is no global p2p network to connect to.
As mainnet coins have value and testnet/regtest coins do not, they are distinguished by different prefixes. Mainnet addresses start with “1”, “3” or “bc1”, testnet/regtest addresses start with “m”, “n”, “2” or “tb1”. Remember, testnet/regtest addresses have no value, so it is important to learn the difference! Wallets can detect the difference, but there were occasions when people were fooled to accept testnet coins for money!
We will use regtest since we can easily create our own blockchain, and blocks can be mined without mining hardware with a handy command, which I will discuss later.
Bitcoin-qt, the graphical Bitcoin Core client, distinguishes between different networks visually as well, to help you identify in which mode it is running. When you first install bitcoin-qt, it will run on mainnet which uses the familiar orange Bitcoin symbol. Testnet uses green, and regtest uses blue.
 Fig. 1. Bitcoin-qt when running mainnet, testnet and regtest.
Ok, but how do I switch to regtest?
No worries, it is pretty easy to switch to regtest. You just need to edit Bitcoin’s configuration file. Luckily, it is easily accessible from the GUI options.
Start bitcoin-qt. When you start it for the first time, it will look like the image in Figure 2. Click on Settings -> Options -> Open Configuration File.
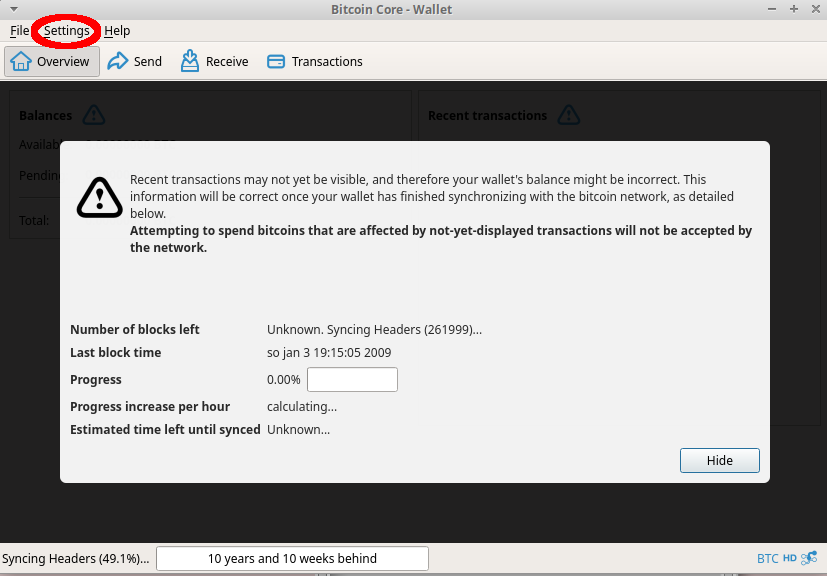 Fig. 2. Accessing bitcoin-qt settings.
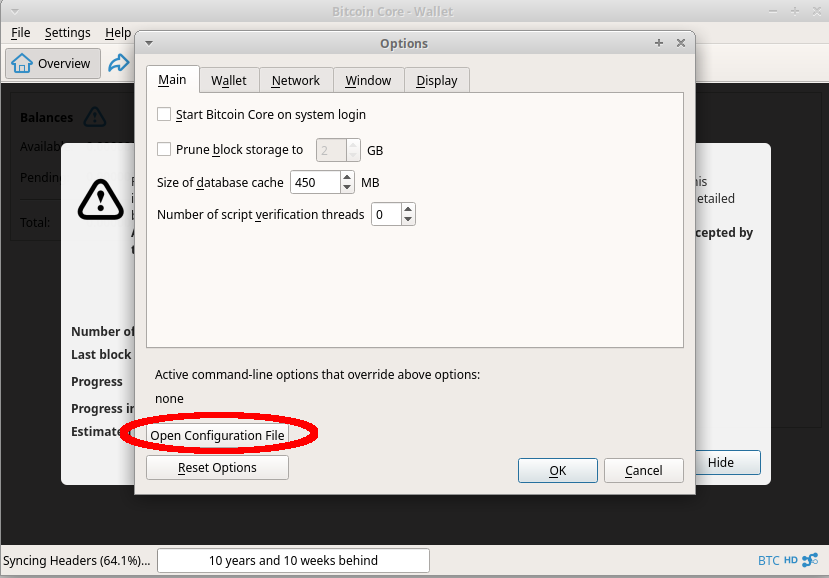 Fig. 3. Opening configuration file.
Add the following line to the configuration file, and then save:
regtest=1
Close bitcoin-qt and reopen it. Your loading screen should look like the one in Figure 3.
Congrats, you are now prepared to look into Bitcoin internals!
Getting familiar with the console
Bitcoin-qt makes it really easy to interact with the Bitcoin daemon. The console is easily accessible in the GUI. You can find it under Help -> Debug window -> Console.
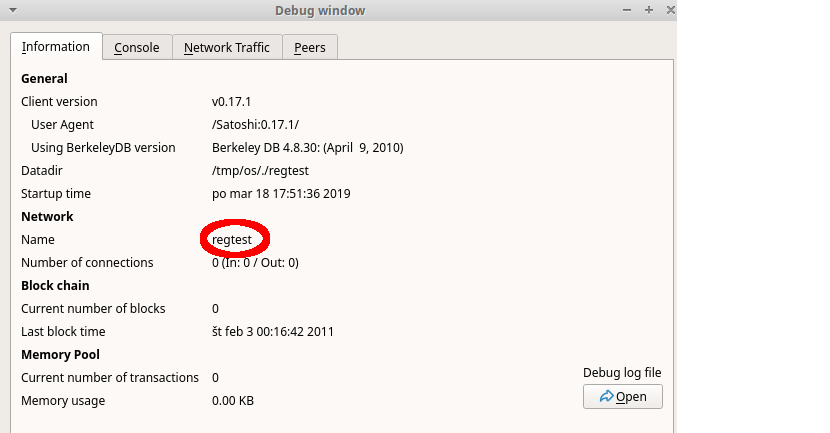 Fig. 4. Information page in debug window.
As you can see, a new window will appear with various information about bitcoin-qt and the network mode it is running in. Note the network name is regtest. Make sure yours is as well.
Let’s click on the console tab as seen in Figure 5.
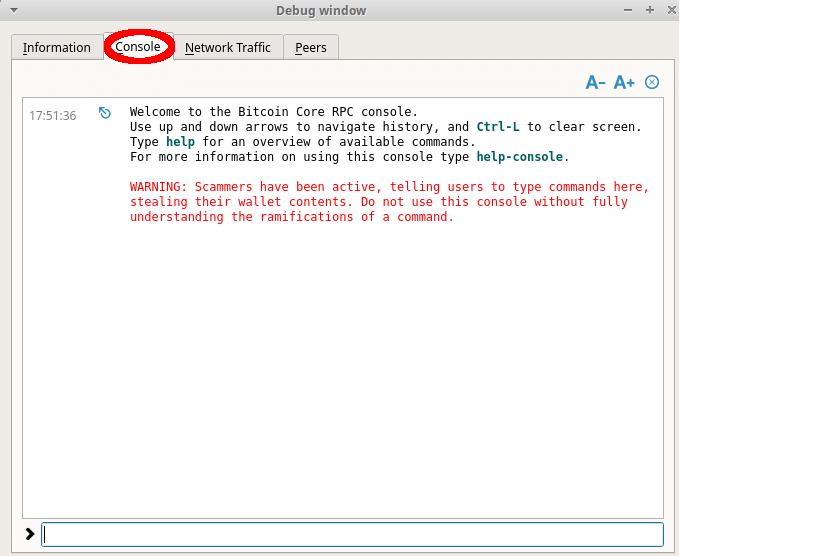 Fig. 5. Information page in debug window.
There are several commands that can be used to interact with the Bitcoin daemon. To see them, type help in the bottom of the window and press Enter. You can scroll up to view the full list of commands. If you want help on a particular command, type in help <command name>.
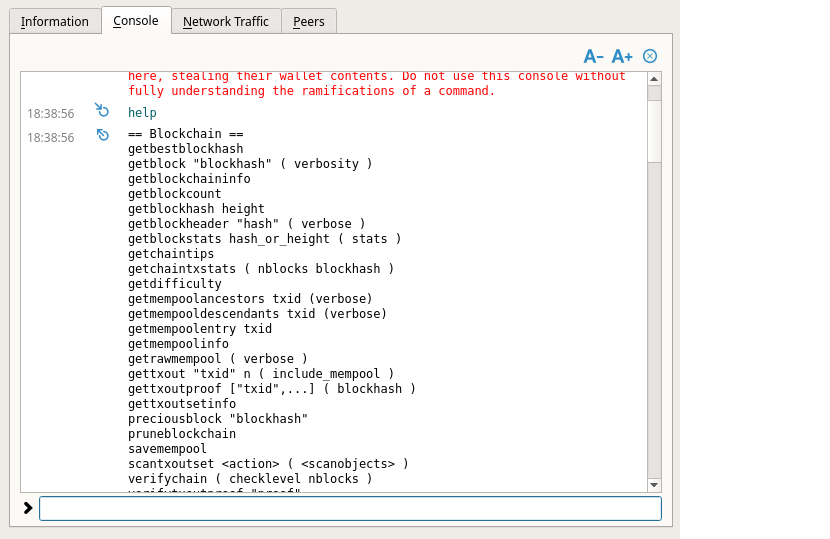 Fig. 6. Partial output of the
 help command.
If you look closely, the third command is called getblockchaininfo. How about finding out what it does? The command help is our friend here :)
Type in help getblockchaininfo. As the help system states, this command will give us information about the blockchain.
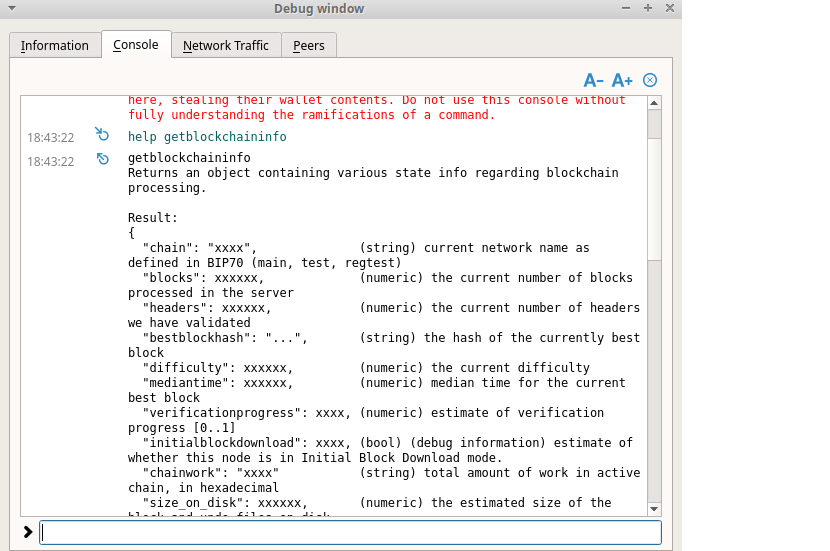 Fig. 7. getblockchaininfo help.
Enter the blockchaininfo command into the console (RPC) window and examine the output. The output is in a strange (at least to non-programmers) format called JSON (JavaScript Object Notation). It is a format that can be easily understood by computers and, with a small effort, by humans as well. The help getblockchaininfo command describes what each key means.
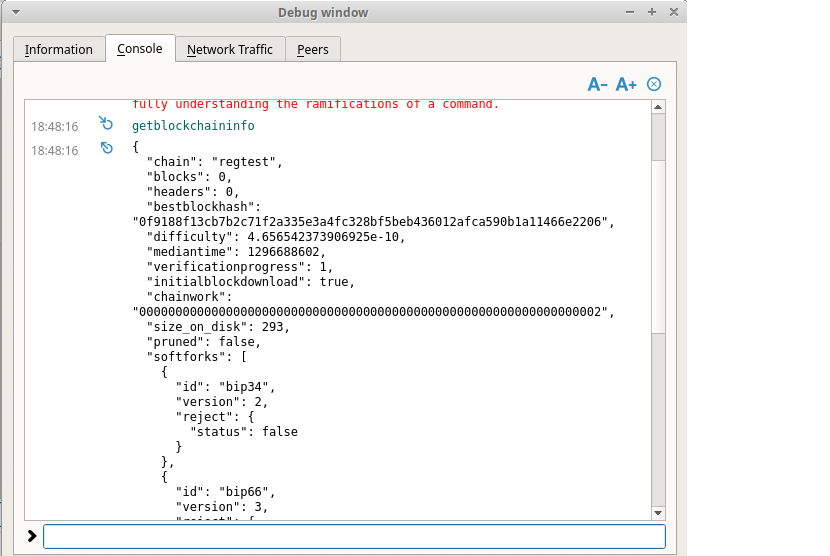 Fig. 8. JSON output of
 getblockchaininfo.
Generating our own blocks
Regtest is now set up, but there are no blocks yet (see the blocks key in the getblockchaininfo response). What kind of blockchain has no blocks?
Generate command to the rescue!
As mentioned at the beginning, a regtest environment allows us to create as many blocks as we want without using any mining ASICs or dedicated hardware. This makes it easy to test different scenarios that can take place during Bitcoin’s operation, with the added luxury of being able to create blocks whenever we want to save time.
Let’s generate some blocks so we have test BTC to play with later. We have to consider the mining rule, that one can spend a block reward only if it has 100 blocks mined before it. That means that we have to generate 101 blocks to make 50 regtest BTC spendable. Open the console and type in:
generate 101
 Fig. 9.
 generate command output.
You will see a lot of popup windows saying “incoming transaction”. Just wait a few seconds until they disappear. The weird numbers and letters are the hashes of the blocks that were generated.
Take note of the numbers below the “Balances” label in Figure 11. We have 50 rBTC available now—remember we generated 101 blocks—so block 1 is mature and the reward can be spent.
Interested in how to spend the reward, what a coinbase transaction is, and how a Bitcoin transaction works?
Join me next time, where we will continue working with the blockchain we just created.